My First Triangle
Introduction
Welcome to this section, my readers! In this section we will learn how coordinates system work in OpenGL and at the end of this
section, we will have our first triangle to our program. I’ve commented out glClearColor 1, .5, 0, 1 from our previous code.
Coordinate System
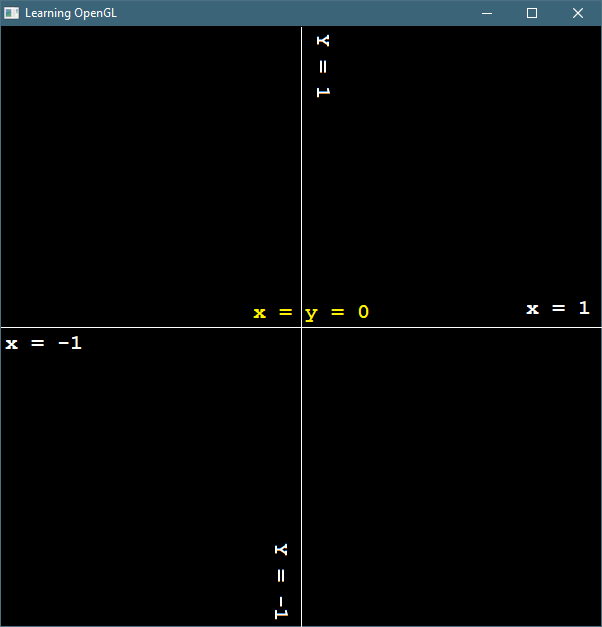
When you are working with OpenGL, the value of x-position is 0 at the centre, -1 at the leftmost of the window and +1 at the rightmost of the window. Similarly, the value of y-position is 0 at the centre, 1 at the topmost of the window and -1 at the bottommost of the window. You can clearly see this in the picture above. Any value of x or y which less than -1 or greater than 1 will be outside of our window (actually for our current window). However, there is no limit of using this value. We’ll discuss about that later in our tutorial. For now, you must have this knowledge that negative x goes to left, positive x goes to right, negative y goes to bottom and positive y goes up.
Our Triangle Vertices
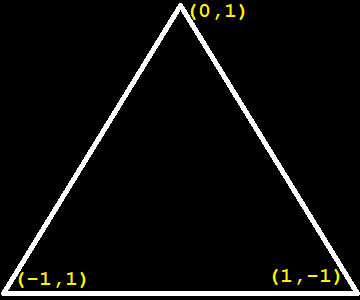
Any geometric figure have several points called vertices. Our Triangle will have 3 vertices as shown below -
We can now tell OpenGL for drawing our triangle with the help of _glBegin(). It’s syntax is as follows -
_glBegin( mode )
- mode : By this, we tell OpenGL how to use vertices for rendering our geometry. It can take value of _GL_POINTS,_GL_LINES, _GL_LINE_STRIP, _GL_LINE_LOOP, _GL_TRIANGLES, _GL_TRIANGLE_STRIP, _GL_TRIANGLE_FAN, _GL_QUADS, _GL_QUAD_STRIP and _GL_POLYGON.
We’ll later discuss in detail about each mode, for now, we will be using _GL_TRIANGLES.
....

SUB _GL ()
    'Here we'll put our OpenGL commands!
    _glViewport 0, 0, _WIDTH, _HEIGHT 'here _WIDTH() and _HEIGHT() gives the width and height of our window.

    '_glClearColor 1, .5, 0, 1
    _glClear _GL_COLOR_BUFFER_BIT

    _glBegin _GL_TRIANGLES

END SUB
We’ll pass our vertices to OpenGL with the help of _glVertex2f() or _glVertex2d() or _glVertex2i(). They all are same, execpt, prefix ‘f’ is for float, ‘d’ is for double and ‘i’ for integer. I use ‘f’ prefix for most of the time. They all have same syntax -
_glVertex2f (x, y)
- x : It is the x-value.
- y : It is the y-value.
After passing our vertices to OpenGL using _glVertex2f(), we use _glEnd() to close the shape/figure/geometry. It does have
any arguement.
Now, our code looks something like this -
_TITLE "Learning OpenGL" 'giving title to your window
SCREEN _NEWIMAGE(600, 600, 32) 'creating a window of 600x600

'This is our main loop
DO
    _LIMIT 40 'Adding this will prevent high cpu usage.
LOOP

SUB _GL ()
    'Here we'll put our OpenGL commands!
    _glViewport 0, 0, _WIDTH, _HEIGHT 'here _WIDTH() and _HEIGHT() gives the width and height of our window.

    '_glClearColor 1, .5, 0, 1
    _glClear _GL_COLOR_BUFFER_BIT

    _glBegin _GL_TRIANGLES
    _glVertex2f 0, 1
    _glVertex2f -1, -1
    _glVertex2f 1, -1
    _glEnd

    _glFlush
END SUB
Before running, I would recommend you to add _glFlush() after the _glEnd(). It forces different buffers commands in several location to complete in finite time. Now run the code, you will have the following output -
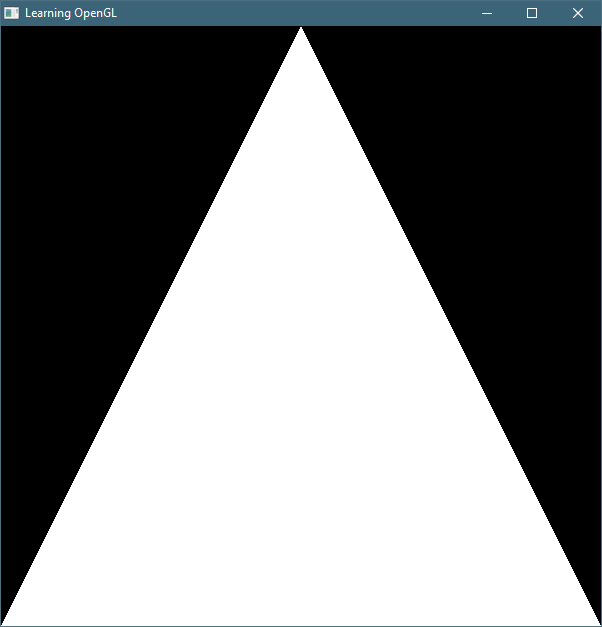
Congratulation! You have your first triangle in OpenGL! You can also give color to it using _glColor3f(). It’s syntax
is as follows -
_glColor3f(r, g, b)
- r : It is the red value between 0-1.
- g : It is the green value between 0-1.
- b : It is the blue value between 0-1.
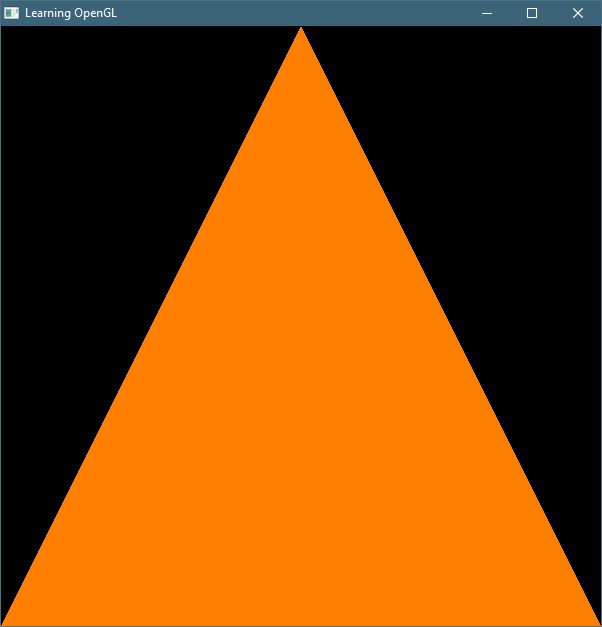
I’ve given orange color to our triangle. Now, our code looks like this -
_TITLE "Learning OpenGL" 'giving title to your window
SCREEN _NEWIMAGE(600, 600, 32) 'creating a window of 600x600

'This is our main loop
DO
    _LIMIT 40 'Adding this will prevent high cpu usage.
LOOP

SUB _GL ()
    'Here we'll put our OpenGL commands!
    _glViewport 0, 0, _WIDTH, _HEIGHT 'here _WIDTH() and _HEIGHT() gives the width and height of our window.

    '_glClearColor 1, .5, 0, 1
    _glClear _GL_COLOR_BUFFER_BIT


    _glColor3f 1, .5, 0

    _glBegin _GL_TRIANGLES
    _glVertex2f 0, 1
    _glVertex2f -1, -1
    _glVertex2f 1, -1
    _glEnd

    _glFlush
END SUB
And our output will look like this -
Before continuing, I would recommend you to go through the exercises, solve them and test your skills!
Keywords you have learned about -
Exercise
- Modify the code to draw the following figure -
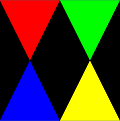
- Modify the code to draw the following figure -
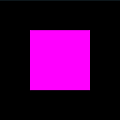
- Modify the code to draw the following figure -
